README file from
GithubNote Status for Obsidian


Track the lifecycle of every file in your vault using statuses you fully control. Note Status brings visual clarity and structured workflows to Obsidian—whether you're managing research notes, writing projects, tasks, or long-term archives.
It works on both Markdown and non-Markdown files, integrates into multiple UI surfaces, and provides configurable dashboards, commands, and fast actions to keep information flowing.
Contents
- Feature Guide: what the plugin can do across commands, UI surfaces, and workflows.
- Settings Reference: every option, grouped like the in-app settings.
Quick start
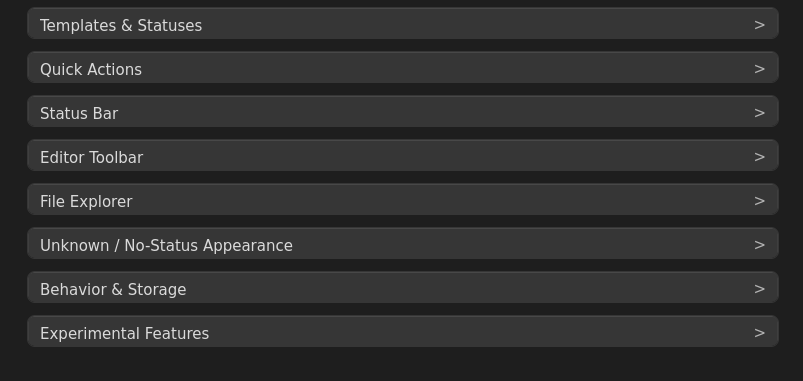
- Open Settings → Note Status.
- Expand Templates & Statuses and keep a built-in template or add your own/custom-only set.
- Pick where to see/change status: Status Bar or Editor Toolbar.
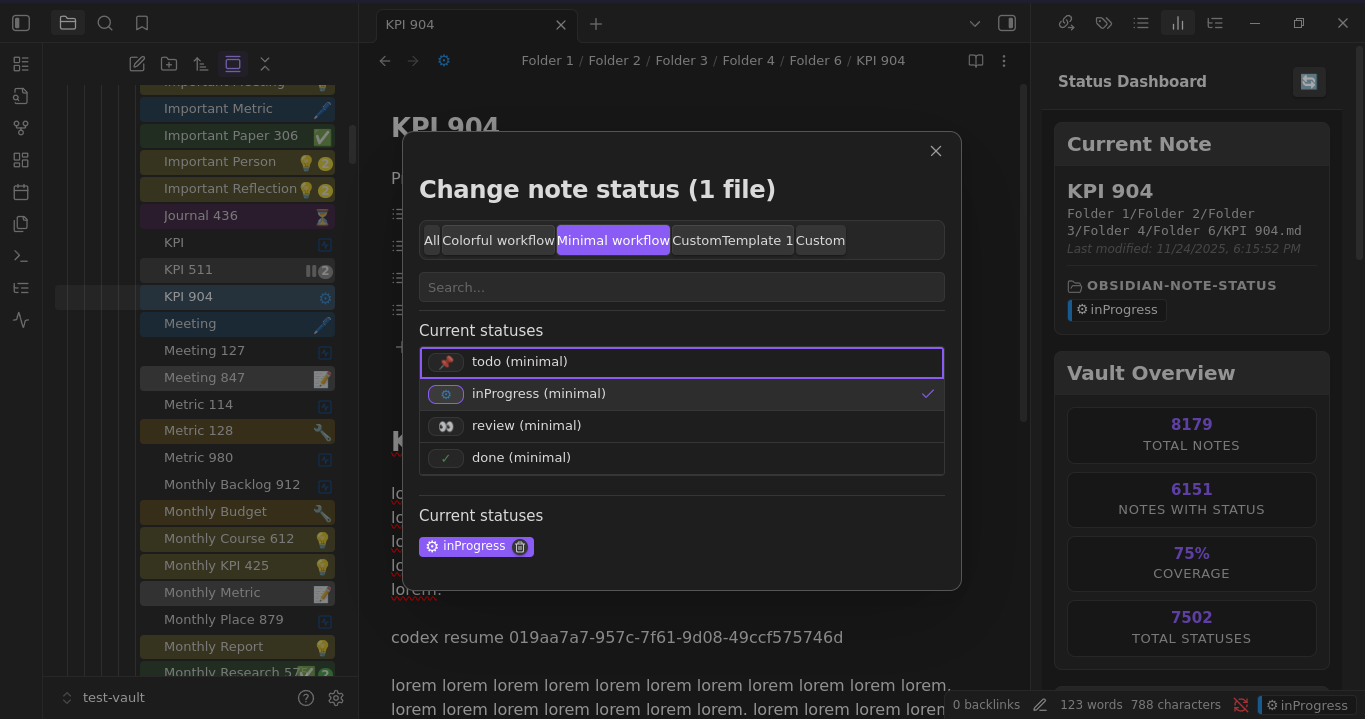
- Set a status from the badge or run
Change current note status. - Watch file explorer icons update; hover for the overview popup or click to change again.
- If enabled, open the Status Dashboard or Grouped Status View from the ribbon/commands.
Key features
- Status picker everywhere: status bar badge, editor toolbar, explorer context menus, commands.
- Multi-status or single-status workflows; quick-status commands for hotkeys.
- File explorer icons with configurable placement, frames, and visual treatments (row tint, underline, dot, border).
- Status bar badges with accent/filled/dot styles and icon/text options; template names can auto-show on conflicts.
- Dashboards and grouped views (gated by experimental toggles and vault size limit) for vault-wide visibility and quick actions.
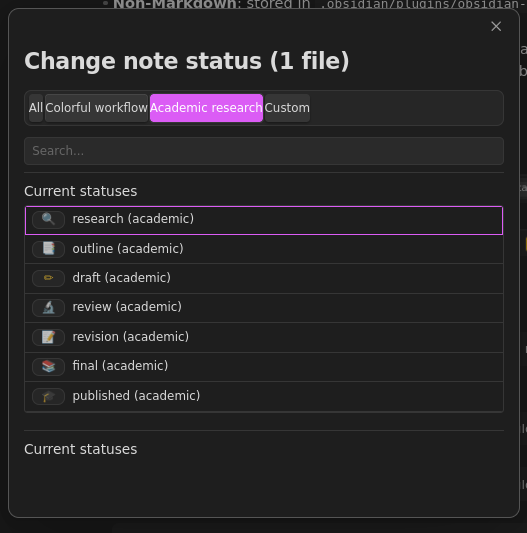
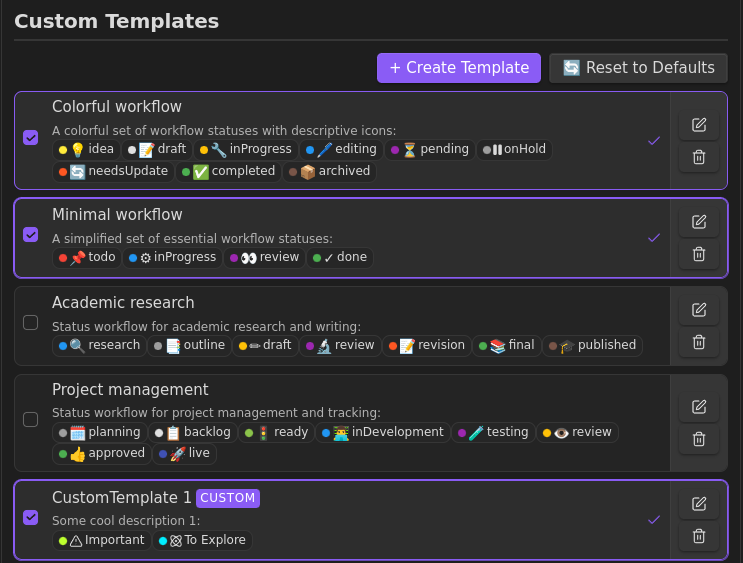
- Built-in templates (Colorful, Minimal, Academic, Project) plus full custom templates and standalone custom statuses.
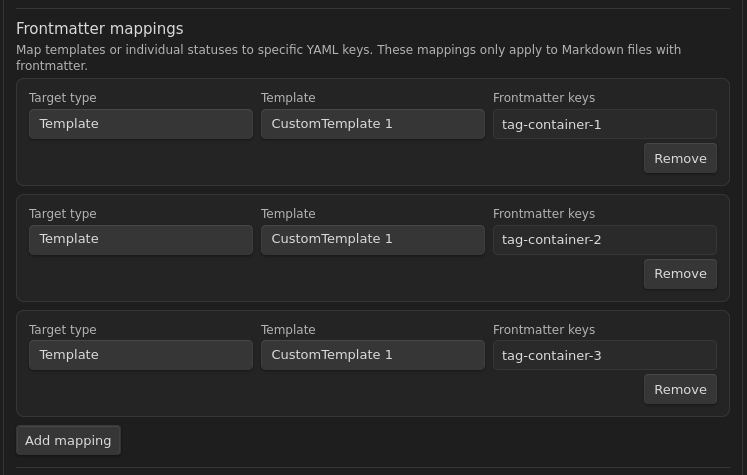
- Works with YAML frontmatter and non-Markdown via a synced JSON store; frontmatter mappings let you write to multiple keys.
Data model
- Markdown: statuses live under the tag prefix (default
obsidian-note-status). Map templates/statuses to extra YAML keys and optionally also write to the default. - Non-Markdown: stored in
.obsidian/plugins/obsidian-note-status/non-markdown-statuses.json, kept in sync on rename/delete. - Single vs multi: multiple statuses by default; single-status mode can store as list (
status: [draft]) or string (status: draft) for compatibility.
Screenshots
-
Nav bar with current status
-
Status assignment:
-
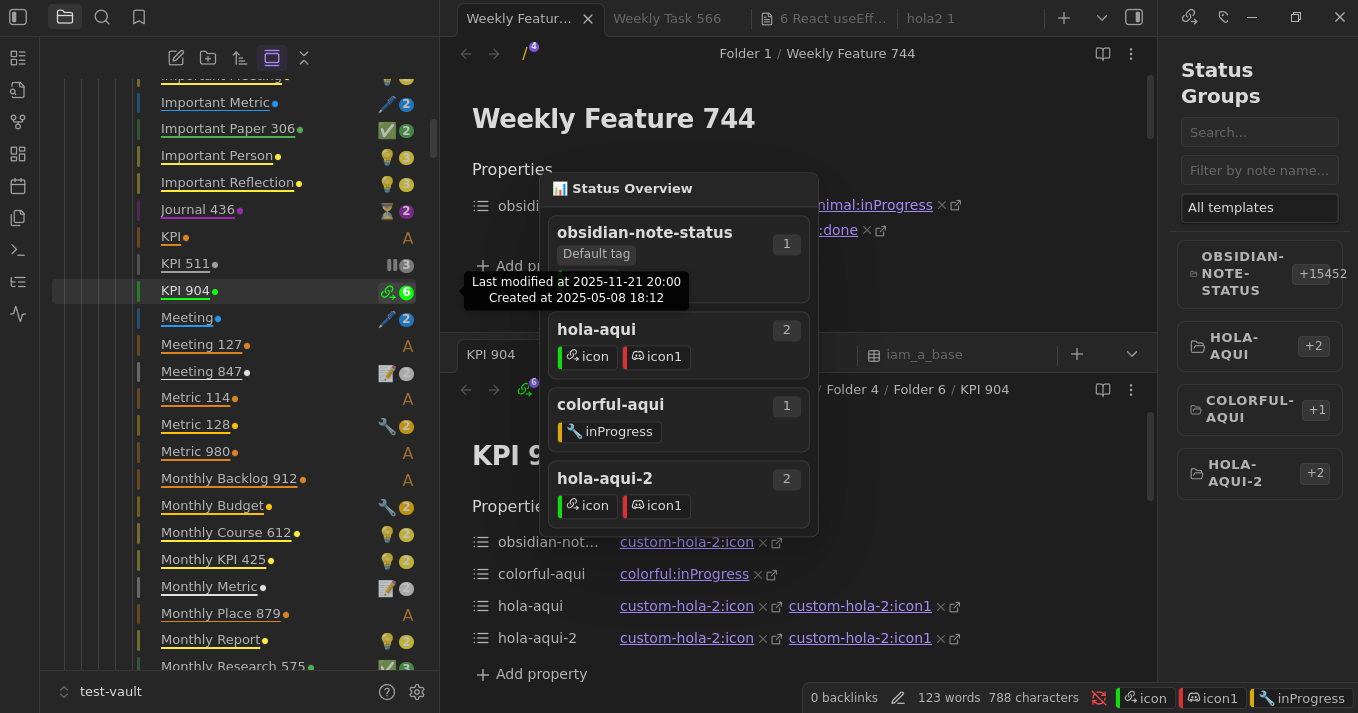
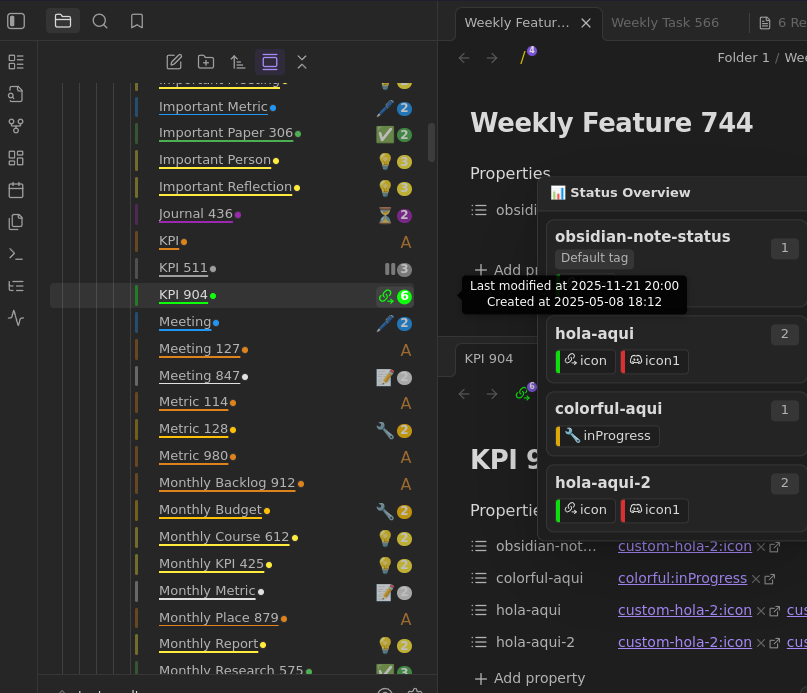
File explorer with status icons and hover overview:
-
Multiple settings:
-
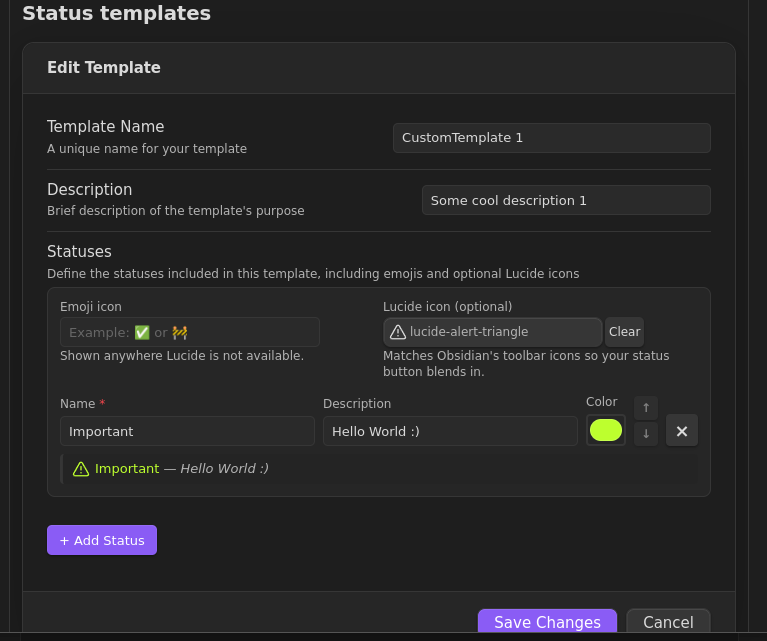
Custom templates editor:
-
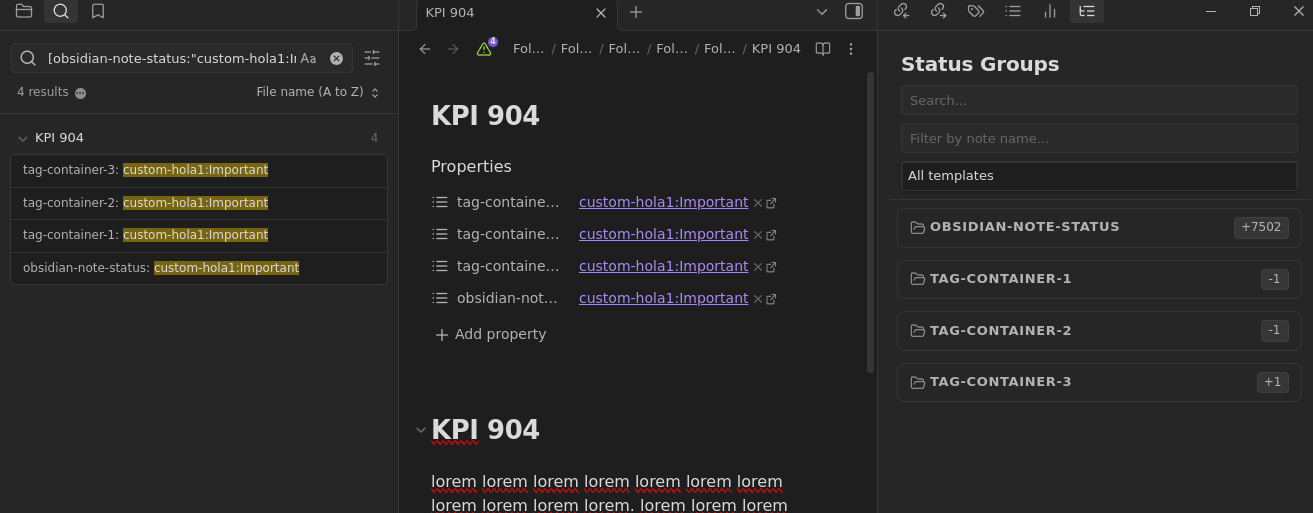
Frontmatter tags mapping
-
Grouped status view:
-
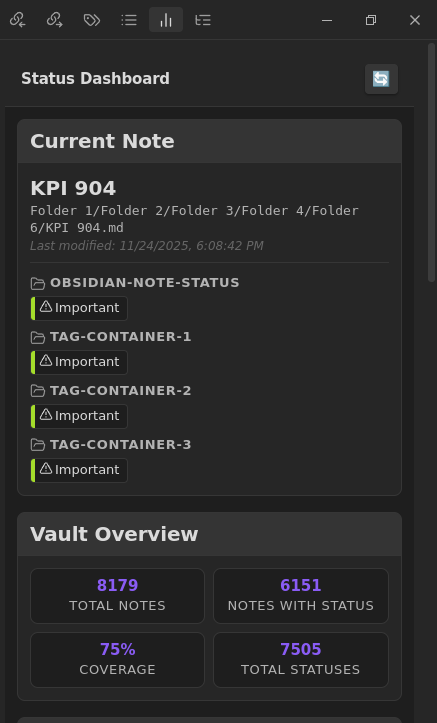
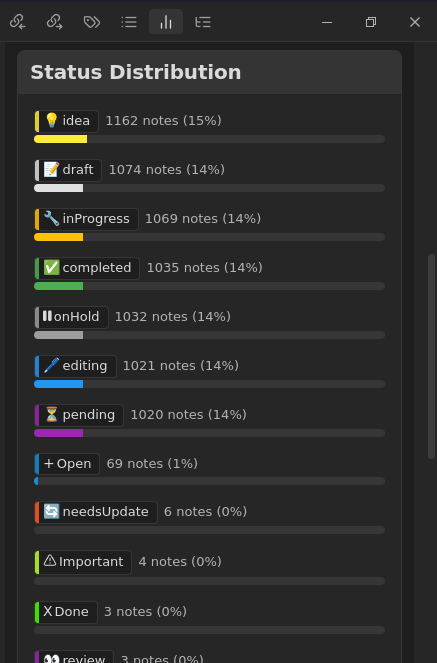
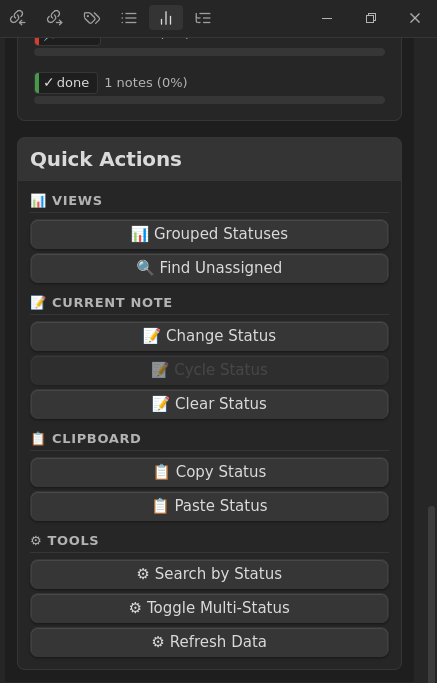
Status dashboard:


Template Marketplace
You can contribute your own status templates to the plugin!
How to contribute (The Easy Way)
- Create a custom template in the plugin settings.
- Click the Share (📤) icon on your custom template.
- Follow the instructions in the modal to copy the JSON and submit a Pull Request to the official repository.
- Maintainers will review your submission and accept it if it passes the revision!
How to contribute (Manual)
- Fork the repository. ...
- Create a new JSON file in the
templates/folder (e.g.,templates/my-awesome-workflow.json). - Follow this format:
{ "id": "my-awesome-workflow", "name": "My Awesome Workflow", "description": "A workflow for doing awesome things", "authorGithub": "your-username", "statuses": [ { "name": "todo", "icon": "📝", "color": "#ff0000", "templateId": "my-awesome-workflow" }, { "name": "done", "icon": "✅", "color": "#00ff00", "templateId": "my-awesome-workflow" } ] } - Submit a Pull Request with your JSON file!
Once accepted and merged, your template will be automatically included in the next build and available in the marketplace for all users.
Installation
Community Plugin Store (recommended)
- Obsidian → Settings → Community plugins.
- Disable Safe mode → Browse → search “Note Status”.
- Install and enable.
Manual
- Download the latest release from GitHub Releases.
- Extract
main.js,manifest.json, andstyles.cssto.obsidian/plugins/note-status/. - Enable in Community plugins settings.
Example workflows
Personal knowledge
💡 idea → 📝 draft → ✏️ editing → ✅ completed → 📦 archived
Project delivery
📋 backlog → 🚦 ready → 👨💻 inDevelopment → 🧪 testing → 🚀 live
Academic
🔍 research → 📑 outline → ✏️ draft → 🔬 review → 📚 final
Data format
Statuses in YAML(as string or array, it depends of your settings):
---
obsidian-note-status:
    - active
    - inProgress
---
Works with Dataview, Templater, QuickAdd, and search. Non-Markdown uses the JSON store noted above.
Support the project
License: MIT · Author: Aleix Soler